Using the pressure_control ROS drivers
- Set up your hardware and control configs
- Start the Pressure Controller
- Manual pressure control
- Build Trajectories
- Run Trajectories Manually
This driver is split into two ROS packages:
- pressure_trajectory_ros is where trajectories are set up, built, and stored for execution
- pressure_control_ros is the main driver that actually interfaces with the pressure control hardware
Set up your hardware and control configs
Follow the ROS Hardware Setup instructions to set up your hardware configuration, and the Control Setup instructions to set up your control config files.
Use an existing plotting config file
We use the rqt_multiplot package for plotting which lets you make/use config files to set up plot groups. You can use an existing profile for now (in the config/plotting folder), and modify/make a new one from inside the plotting window when it’s running.
Start the Pressure Controller
To begin running a pressure controller, use the following commands:
roscore &
roslaunch pressure_controller_ros bringupHID.launch  hw_profile:=[HARDWARE CONFIG]  profile:=[CONTROL_CONFIG]
In the “config” folder of the “pressure_control_ros” package, you can set up hardware configurations. the “DEBUG.yaml” configuration is a good place to start.
Note that you don’t need to include the file extension “.yaml’
Manual pressure control
Setting pressure manually is simple. Just run the gui from a new terminal:
rosrun pressure_controller_setup rqt_set_pressure.py
# OR
rosrun pressure_controller_setup rqt_set_pressure_adv.py
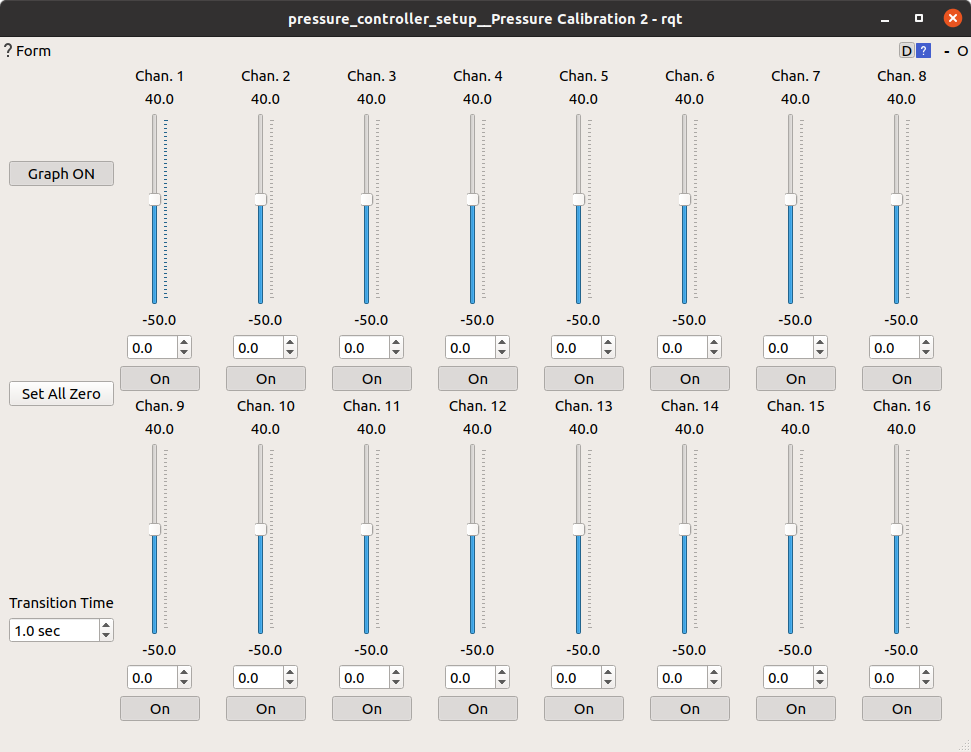

The Manual pressure setting GUI inherits properties from the configuration node:
- Number/configuration of channels. This allows the gui to dynamically arrange rows of sliders, one for each physical pressure controller.
- Minimum and maximum pressures
- Transition time
- Channel on/off states
- GUI Config property (tells the gui how to bind pressure channels to sliders)
Example of gui config parameter for basic single-channel operation with two rows of sliders:
gui_config:
    - # Row 1
        # Group 1: Bind channels to two separate sliders horizontally configured
        - 'channels': [0,1]
          'layout': 'horiz'
        # Group 2: Bind channels to two separate sliders horizontally configured
        - 'channels': [2,3]
          'layout': 'horiz'
    - # Row 2
        # Group 3: Bind channels to two separate sliders horizontally configured
        - 'channels': [4,5]
          'layout': 'horiz'
        # Group 4: Bind channels to two separate sliders horizontally configured
        - 'channels': [6,7]
          'layout': 'horiz'
Example of gui config parameter for differential pressures:
gui_config:
    - # Row 1
        # Group 1: Bind channels to a "differential" slider set
        - 'channels': [0,1]
          'layout': 'diff'
        # Group 2: Bind channels to a "differential" slider set
        - 'channels': [2,3]
          'layout': 'diff'
        # Group 3: Bind channels to a "differential" slider set
        - 'channels': [4,5]
          'layout': 'diff'
        # Group 4: Bind channels to a "differential" slider set
        - 'channels': [6,7]
          'layout': 'diff'
Build Trajectories
To build a pressure trajectory, you can either discretize a periodic waveform, or use a set of waypoints.
Set Up a Trajectory
- In the “pressure_trajectory_ros” package, browse the “traj_setup” folder. This is where you can set up trajectories to be built.
- In the “examples” folder, open “planar2seg_demo.yaml”. This example will produce a triangle wave with some prefix and suffix to that trajectory.
- Examine the “settings” section of the file. Here we note that the trajectory is of type “waveform” and it is not designed to be wrapped (repeated over and over).
- Examine the “config” section of the file. Here we notice a few things:
- Only channels 1 and 2 are active
- The waveform is a triangle wave of frequency 0.25 Hz
- The waveform is repeating two times, and each cycle is discretized into 90 sub-samples.
- Next, we can see the “setpoints” section has some prefix waypoints (which will be executed before the waveform), and suffix waypoints (executed after the waveform).
Build a Trajectory
Building a trajectory is a single command through roslaunch:
roslaunch pressure_trajectory_ros build_traj.launch profile:=example/planar2seg_demo
Note that you don’t need to include the file extension “.yaml’
Run Trajectories Manually
- Make sure you have started the pressure control interface:
roslaunch pressure_controller_ros bringup.launch profile:=DEBUG
- In a new terminal, upload the trajectory:
roslaunch pressure_controller_ros load_traj.launch profile:=example/planar2seg_demo
- Start running the trajectory:
roslaunch pressure_controller_ros run_traj.launch