Control Setup
Build a controller config file
Set up all the control settings (like which channels are on, PID gains, etc.).
- Create a new control config file based on an existing one (must be located in the
config/controlfolder of your package)- Configuration files are “.yaml” files with a few specific fields related to actual pressure control
- Update relevant fields for your hardware setup
Control config fields
- Channel Settings
- num_channels (
int) - Number of channels total (across all devices) - states (
list(bool)) - The On/Off state of each channel. (Length of this list much match num_channels)
- num_channels (
- data_loop_time (
int) - The period (in ms) to send data back from the controllers. (min value is ~4ms) - PID Settings
- all_equal (
bool) - Decide whether the PID gains of all channels are set the same values - integrator_start (
float) - The window around the setpoint in which integration is allowed. (This prevents integrator windup) - values (
list(float)) - The actual P, I, and D values (in that order). Set to a list of length 3 to give all channels the same gains. Set to a list of lists to specify gains on a per-channel basis (much include values for all channels if using this option).
- all_equal (
- valve_offsets (
list(list(int))) - PWM offset values for valves. Set to a list, where each entry is a list of length 2 with the source and vent offsets for that particular channel. - max_pressure (
float) - Maximum pressure (in psi) before software watchdog kicks in. Set to a number to apply the same value to all channels. Set to a list to specify values on a per-channel basis (much include values for all channels). - min_pressure (
float) - Minimum pressure (in psi). Setpoints are clipped to this value. Set to a number to apply the same value to all channels. Set to a list to specify values on a per-channel basis (much include values for all channels). - transitions (
float) - Default transition time (in sec) when sending single setpoints to the controller - echo (
bool) - Turn debugging command echos on (usually this should be false)
Tune valve PWM offsets
The PWM offsets allow us to do smooth control starting from the voltages at which the valves just barely crack open. This ensures we can actually control the flow rate smoothly. You will need to re-calibrate these every so often as the resistance and mechanical parts of the valves will slightly change over time.
-
Bringup the pressure controller(s)
roscore & roslaunch pressure_controller_ros bringupHID.launch hw_profile:=[HARDWARE CONFIG] profile:=[CONTROL_CONFIG] -
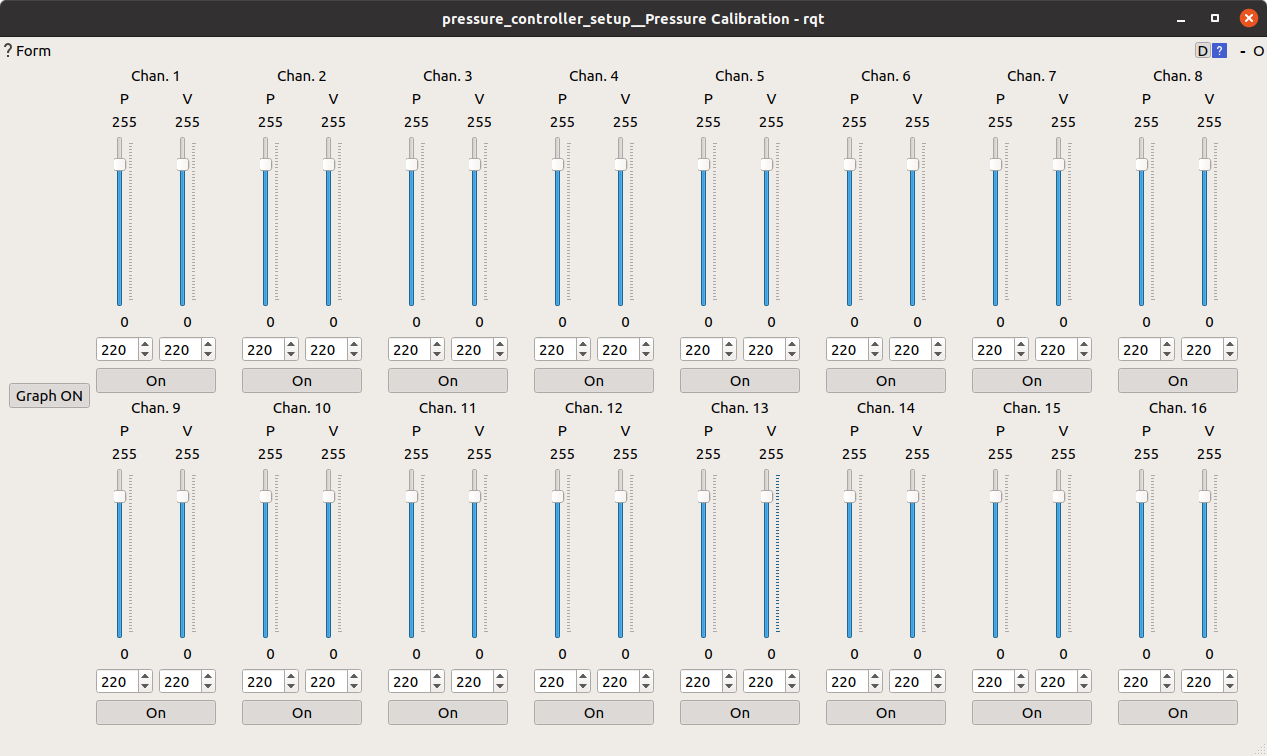
Start up the valve calibration gui (in a new terminal)
rosrun pressure_controller_setup rqt_calibrate_valves.py - Listen to the valves, observe the resulting data, and update your config
- If the valves hum for a short time before you see any actual air flow and there is low-frequency oscillations in pressure, increase the PWM value for that channel by ~2-3.
- If the valves click a lot and pressure oscillates rapidly while maintaining a steady pressure, decrease the PWM value for that channel by ~2-3.
- You may need to set the voltage offsets differently for the source and vent valve in each channel if (for example) a channel can provide pressure but has trouble venting.
-
When you’re done, close the gui and your new valve offsets will print to the terminal (like this):
 Final Valve Offsets:
 [[229, 229], [234, 244], [241, 234], [234, 234], [225, 225], [216, 213], [221, 220], [228, 228]]

 Copy these settings into 'valve_offsets' in your control config file
Once you tune these values, you should be all set. They are related to properties of the actual valves, not the load you are driving, so you will only need to re-calibrate this avery so often throughout the year.
IMPORTANT: Remember to either:
- Copy these values into all of your config files OR
- Remove the ‘valve_offsets’ parameter from your config files.
These valve offset settings are saved to the controller when you close the gui, so they will be recalled each time the controller is powered up unless you overwrite them by putting them in your config files.
Tune PID gains
Since a PID controller is inherently model-free, you will need to tune the gains for each new load (pneumatic device) you place on each channel. The following process seems to work reasonably well:
-
Bringup the pressure controller(s) with the current (or default) PID values stored in your control config file
roscore & roslaunch pressure_controller_ros bringupHID.launch hw_profile:=[HARDWARE CONFIG] profile:=[CONTROL_CONFIG] -
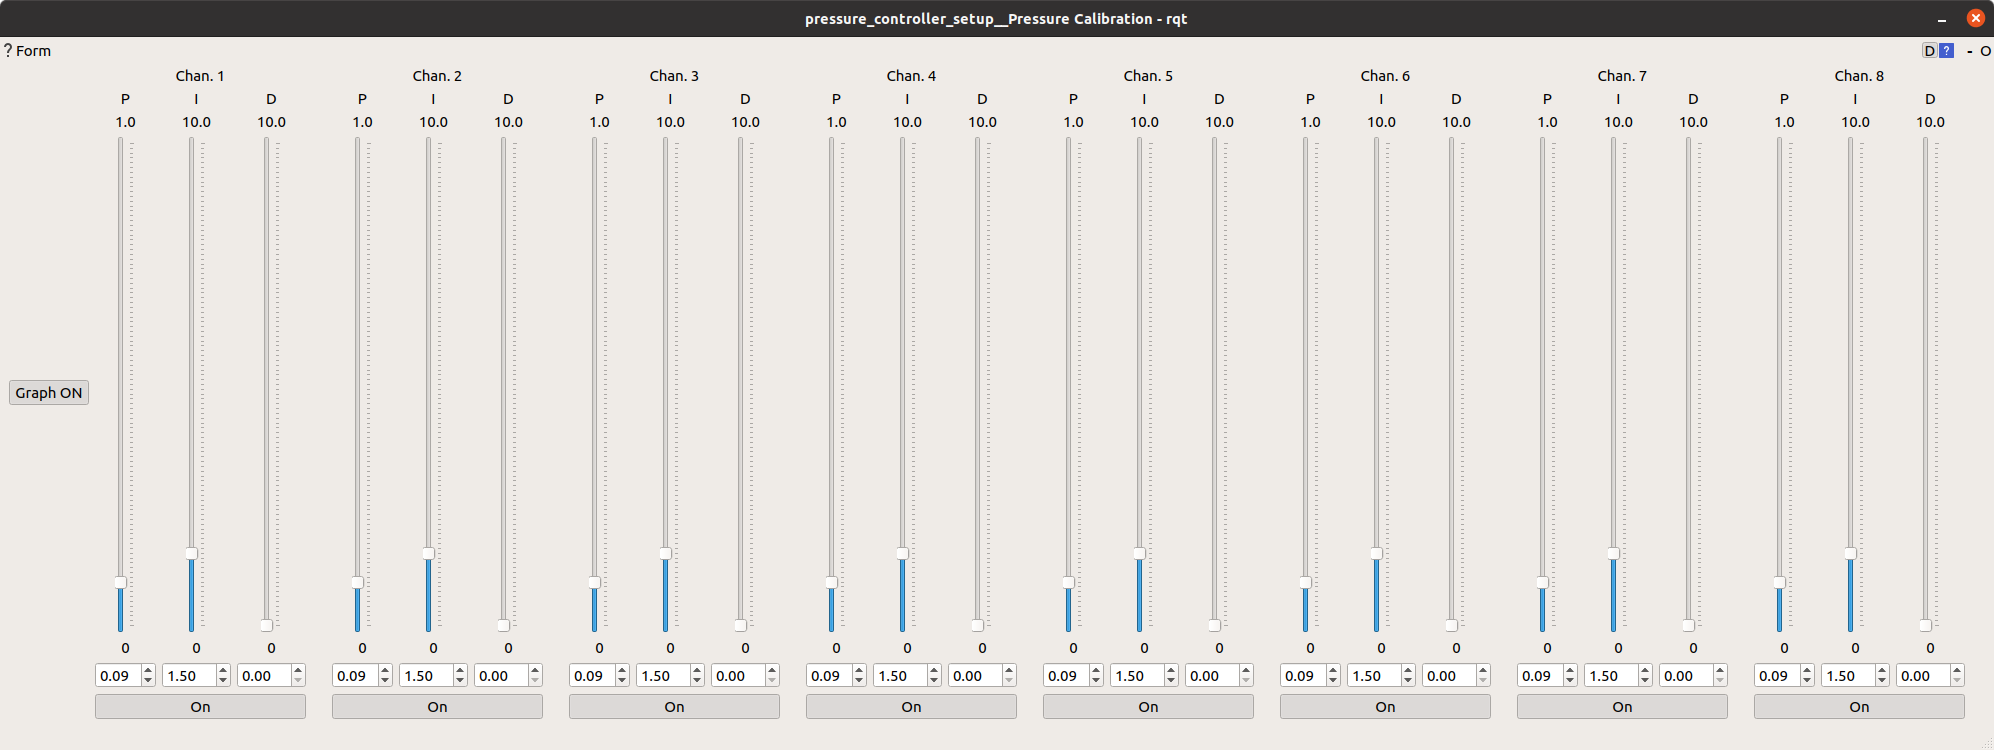
Start up the pid calibration gui (in a new terminal)
rosrun pressure_controller_setup rqt_calibrate_pid.py -
Start up the manual pressure control gui (in a new terminal)
rosrun pressure_controller_setup rqt_set_pressure_adv.py - Set
Igain andDgain to 0 to begin. - Apply a small step change in pressure to all channels and observe the resulting data:
- If the controller oscillates, decrease
Pgain and until it stops. - If the controller does not oscillate, increase
Pgain until it starts oscillating, then back off slowly until it stops.
- If the controller oscillates, decrease
- Add integral gain
- Set
Ito a value roughly 1/10th of the current value ofPfor each channel and test. - If the controller oscillates, decrease the
Igain - If the controller takes a while to reach the setpoint, increase the
Igain
- Set
- Add derivative gain (optional)
- In testing, it usually seems like a P-I controller works very well to achieve fast, reliable pressure control. If you do see lots of sharp motions in the control, you can add a small value of
Dgain (roughly 1/10th the current value ofP) to smooth this off.
- In testing, it usually seems like a P-I controller works very well to achieve fast, reliable pressure control. If you do see lots of sharp motions in the control, you can add a small value of
-
When you’re done, close the gui and your new PID values will print as a list of lists in the terminal (like this):
 Final PID Gains:
 [[0.09, 1.5, 0], [0.09, 1.5, 0], [0.09, 1.5, 0], [0.09, 1.5, 0],
 [0.09, 1.5, 0], [0.09, 1.5, 0], [0.09, 1.5, 0], [0.09, 1.5, 0]]
IMPORTANT: Remember to copy the output PID gains into the pid/values field in all relevant config files:
Based on some basic testing, we found that the values you come up with here are reasonably robust to changes in the load, so you will only need to re-tune these values if you have a substantially different pneumatic device.